In connection with our latest article on Auto Rate feature, this tutorial will show you how you can apply the feature into your campaign.
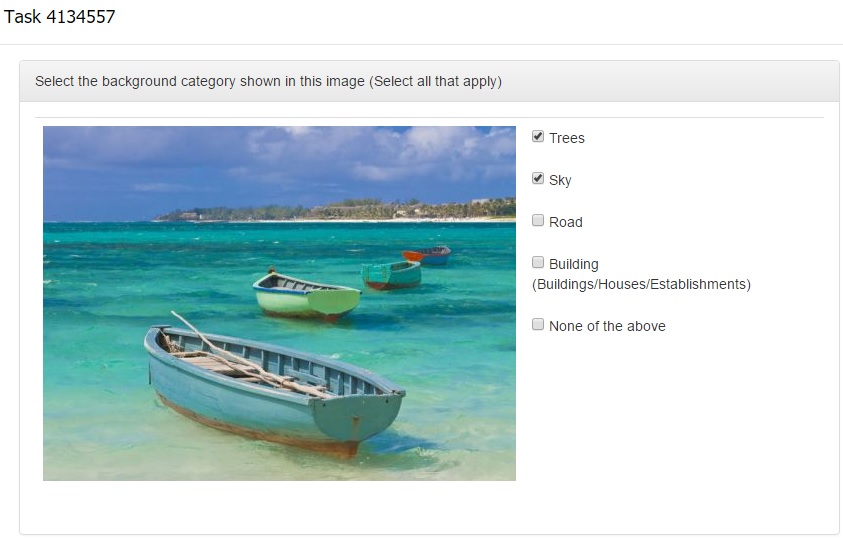
Let us say your campaign requires workers to categorize backgrounds seen in your provided image. There are 5 given keywords for workers to select. Campaign template may look like this:
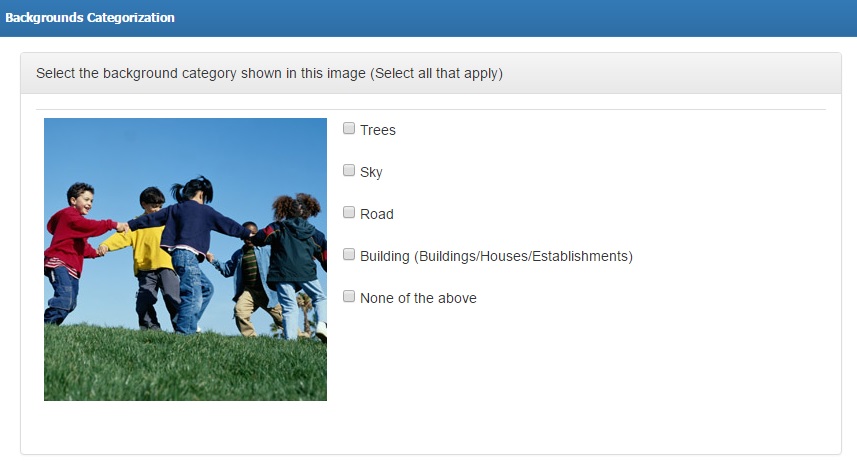 Scenario 1
Possible Expectation:
- Workers can randomly select any keywords.
- If a worker select any from the first four keywords (Trees, Sky, Road, Building), it may be considered as correct. Thus, you prefer to manually rate the proofs.
- When worker chooses “None of the Above” keyword, answer is considered as not correct.
Possible Enabled Auto Rate Option 1:
- You want to Auto Rate NOK (Not Satisfied) worker/s who will choose “None of the above” as their answer.
Flow of Execution:
- When worker ticks checkbox for “None of the above” keyword, the system detects value as “TRUE” and will check with your provided test case answer. (Provided test case is “FALSE” for “None of the above”).
- Since provided test case is “FALSE”, the system will detect it as an incorrect answer and calculate success rate.
- Success rate is set to 100% and worker’s success rate will be 0% as the worker provided an incorrect answer.
- System will check autorate enabled option and rate task as NOK since worker’s success rate is below minimum success rate.
What you need to do to Auto Rate NOK for “None of the above” answers:
Note that you have the option to change auto-rate configuration at any state. With this sample, we are going to set the Auto rate for NOK option upon campaign creation.
- From step 3 of campaign creation page, tick the Autorate Task Option for “Rate NOK is Less Than Minimum Success Score”. Then set the “Minimum Success Rate” to whatever rating you feel is needed. In our sample, we have set the Minimum Success Rate to 100%.
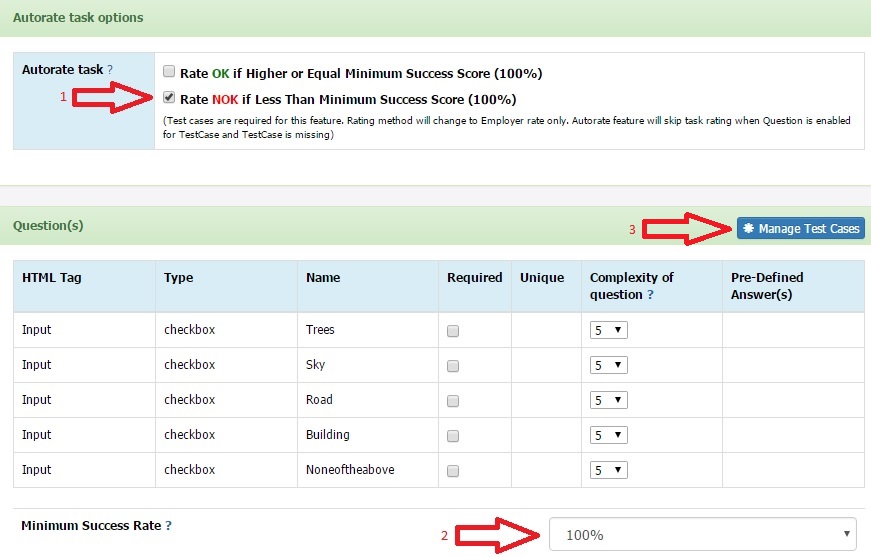
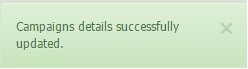
- A confirmation pop-up message will appear acknowledging your setting.
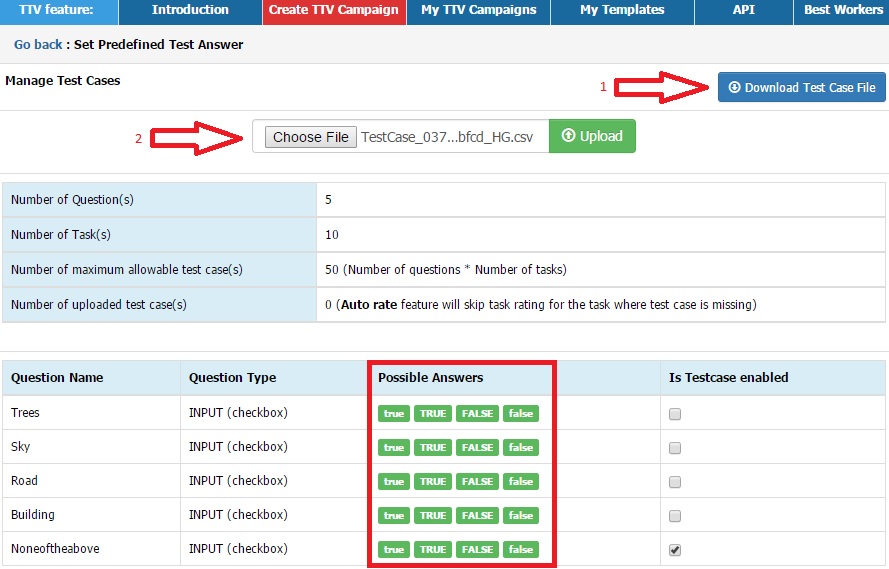
- Once done with setting the Minimum Success Rate, click the Manage Test Case blue button, as shown in the picture above. It will then redirect you to the Manage Test case page. In this page, you will be able to download test case file for you to input the desired correct answers. Possible answers for your test case file is shown in the “Possible Answers” box.
Note:
⇒ For the correct answer, Possible Answer in the test case file should be “TRUE” (case insensitive).
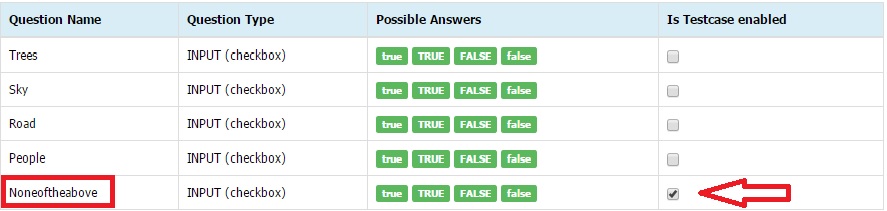
- Since you only want to enable Auto Rate NOK for the “None of the Above” keyword, you should select “Is Testcase enabled” for the “Noneoftheabove” Question Name in order for the system to check which among the Question Names is enabled for Auto rate feature.
- Next step is to click the “Download Test Case File” so you can enter the corresponding answers then save and upload. Test Case file with answers may look like this:

- Once you have uploaded the Test Case file with answers, enabled Auto Rate for NOK will now take effect. Since you have chosen only to Auto Rate NOK answers, you need to manually rate the rest of the proofs. For manual rating, you may choose from the following rating options: Rate Tasks View 1, Rate Tasks View 2, Rate Tasks by CSV, Rate Tasks by ID. Manual Rating is explained in this article:
Scenario 2
Possible Expectation:
- Workers need to select the correct keyword/s in the given image.
- When worker ticks checkbox for “None of the Above” keyword, answer is considered as incorrect.
Possible Enabled Auto Rate Option 2:
- You want to enable both Auto Rate feature for OK and NOK proofs.
Flow of Execution:
- System will compare answers of workers from the Test Case file uploaded.
- If the value of the answer matches with the Test Case answer, system will check autorate enabled option and rate task as OK.
- If the value of the answer did not match the Test Case answer, the system will detect it as an incorrect answer and calculate success rate.
- Success rate is set to 100% and worker’s success rate will be 0% as the worker provided an incorrect answer.
- System will check autorate enabled option and rate task as NOK since worker’s success rate is below minimum success rate.
What you need to do to Auto Rate both OK and NOK answers:
This time we will modify the auto-rate configuration while our campaign is active. Since we have already enabled Auto Rate for NOK in our sample campaign above, in the individual campaign page, we just need to tick the Autorate Task Option for “Rate OK if Higher or Equal Minimum Success Score (100%)” .

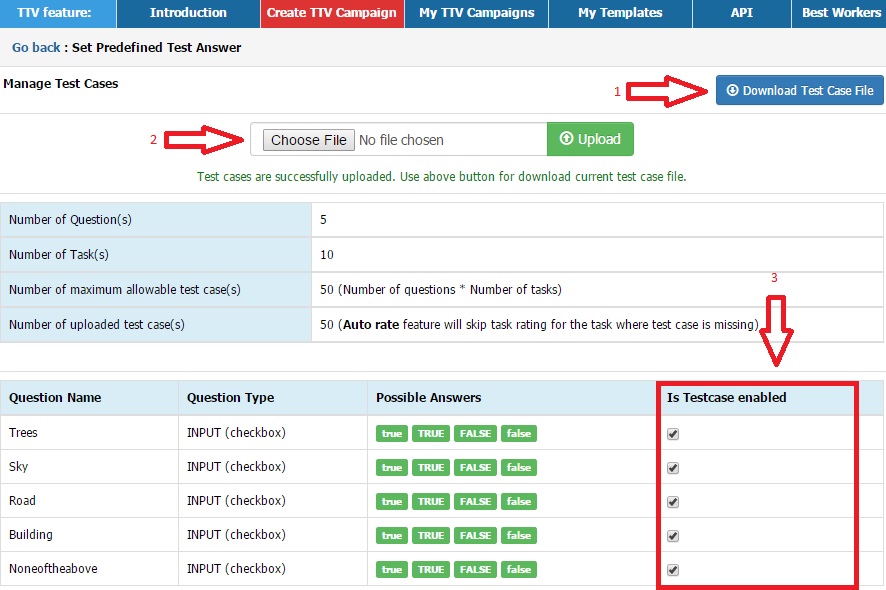
Then click the Manage Test Case button again to Download and Upload Test Case File answers. We need to tick all checkboxes in the “Is Testcase enabled” for all Question Names since you want the system to auto rate both OK and NOK answers.
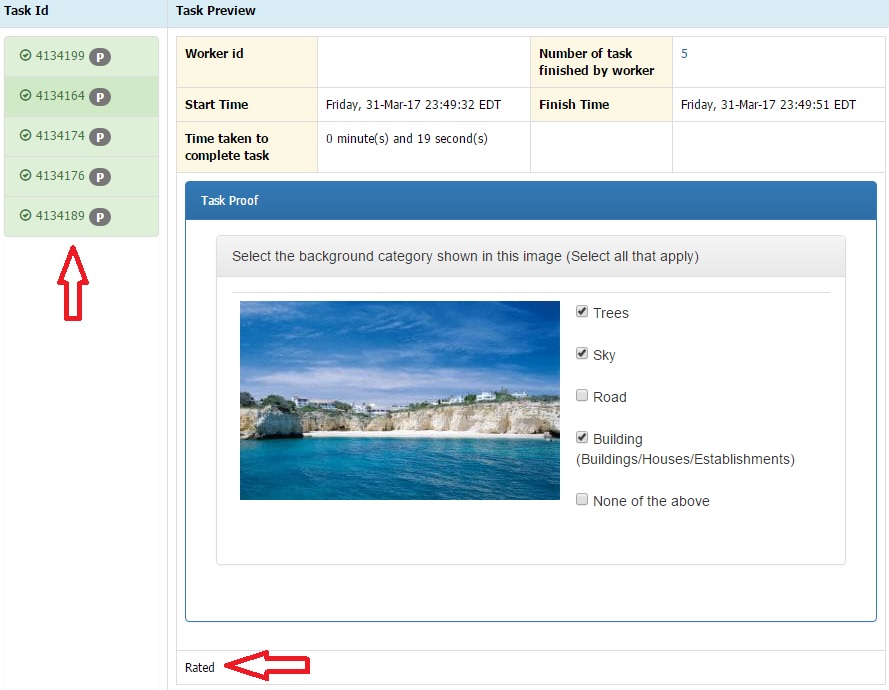
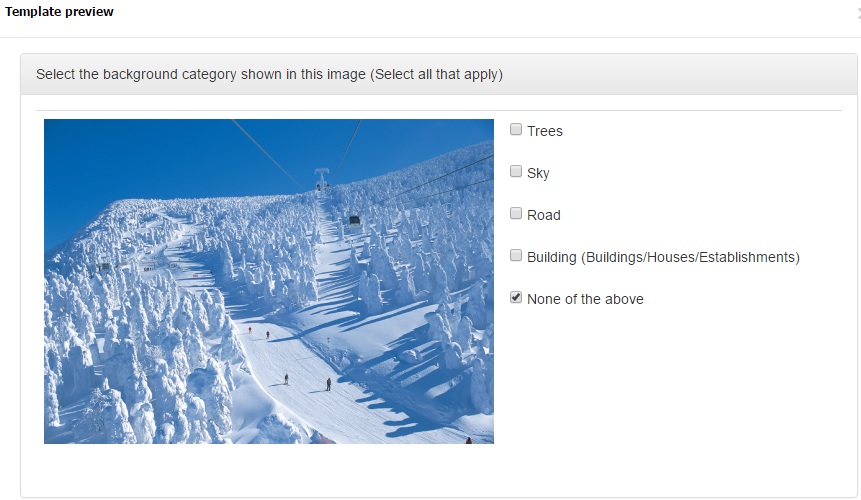
Once positions have been filled in, enabled auto rate will now take effect. If you want to check all proofs auto rated as OK, you may choose from Rate Tasks View 1, Rate Tasks View 2, Rate Tasks by ID. In Rate Tasks View 1, you may click any Task ID from the left and template as well as the answer of the worker will be shown. Task is already rated as OK.
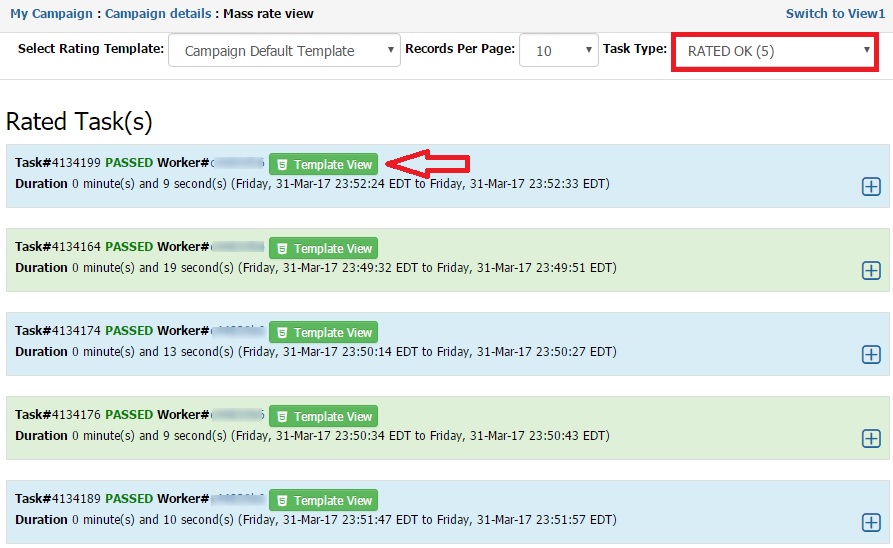
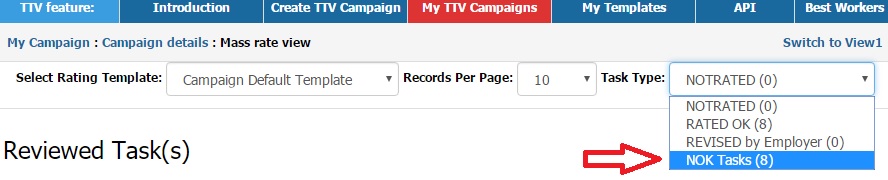
In Rate Tasks View 2, choose the “Rated OK” in the Task Type dropdown menu and all auto rated as OK answers will be shown. Click the “Template View” to view worker’s answer.
In Rate Tasks by IDs, you need to click the Task ID number so the Template as well as the answer of the worker will be shown.
Should you wish to check all the answers auto rated as NOK, go to the Rate Tasks View 2 rating option and click the “NOK Tasks” option. Then click “Template View” to view the answer of the worker.
You might also be interested in:
No Comments so far.
Your Reply